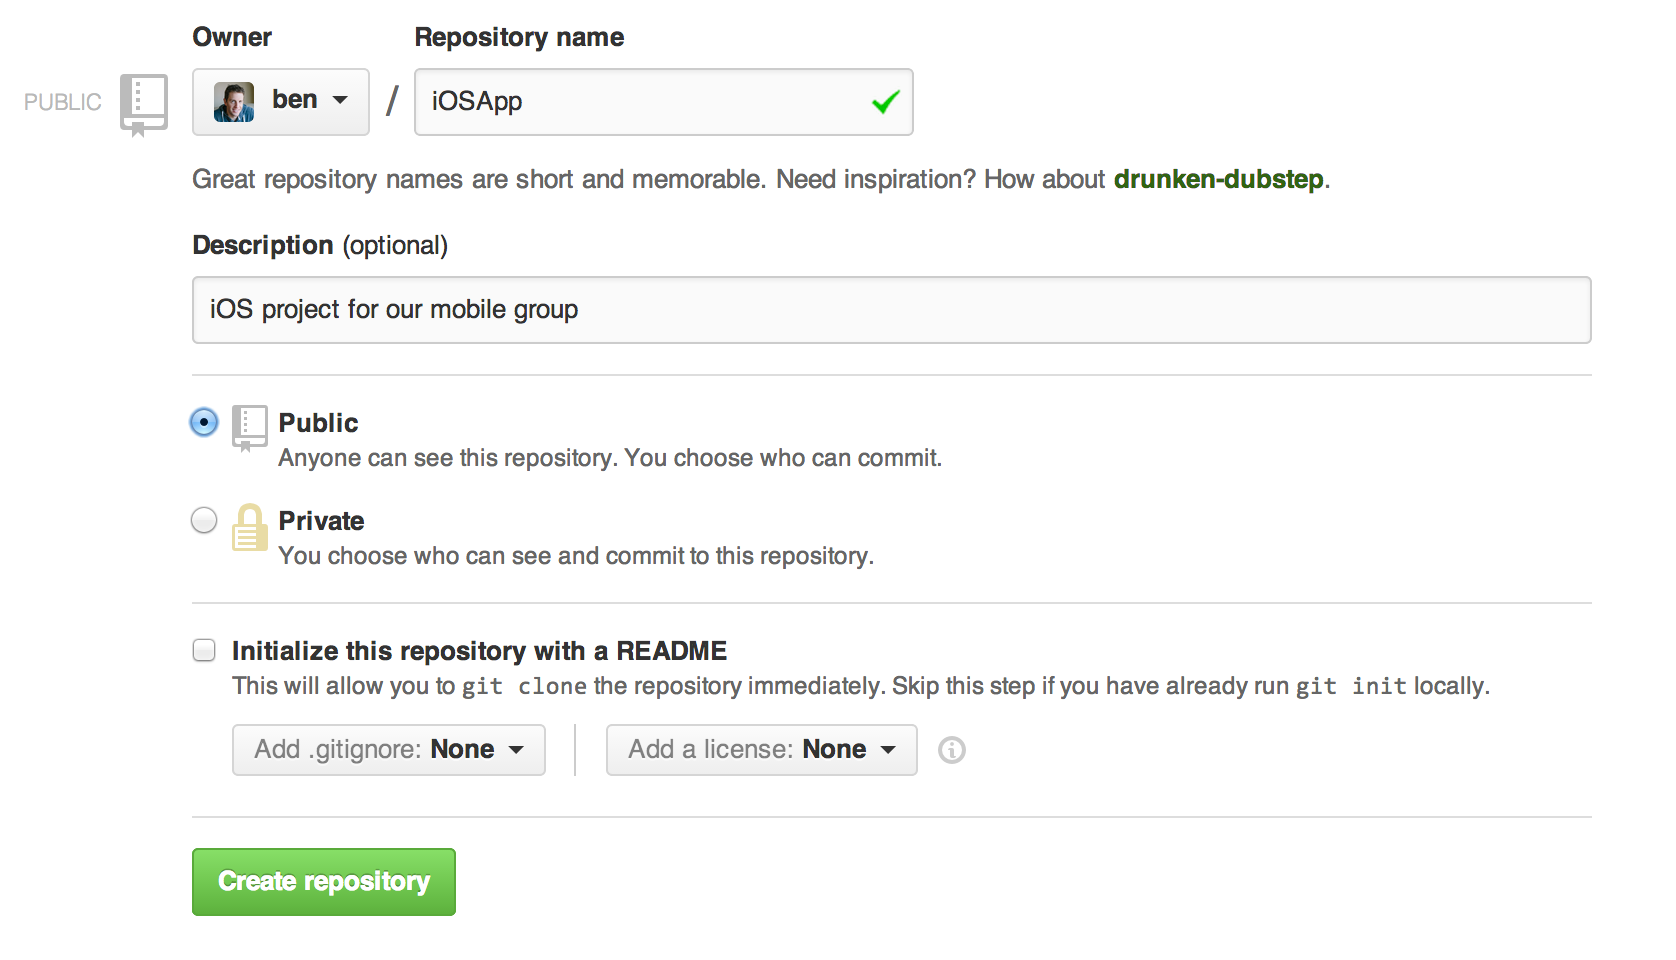
Step 3: Create a New Repository
- Log in to your GitHub account.
- Click on the "+" icon in the upper right corner and select "New repository".
- Fill out the repository name, description, and choose public. Click "Create repository".

This tutorial will guide you through the process of uploading your projects to GitHub.
Visit github.com and sign up for a new account if you don’t already have one.
Download and install Git on your machine. You can get it from git-scm.com.

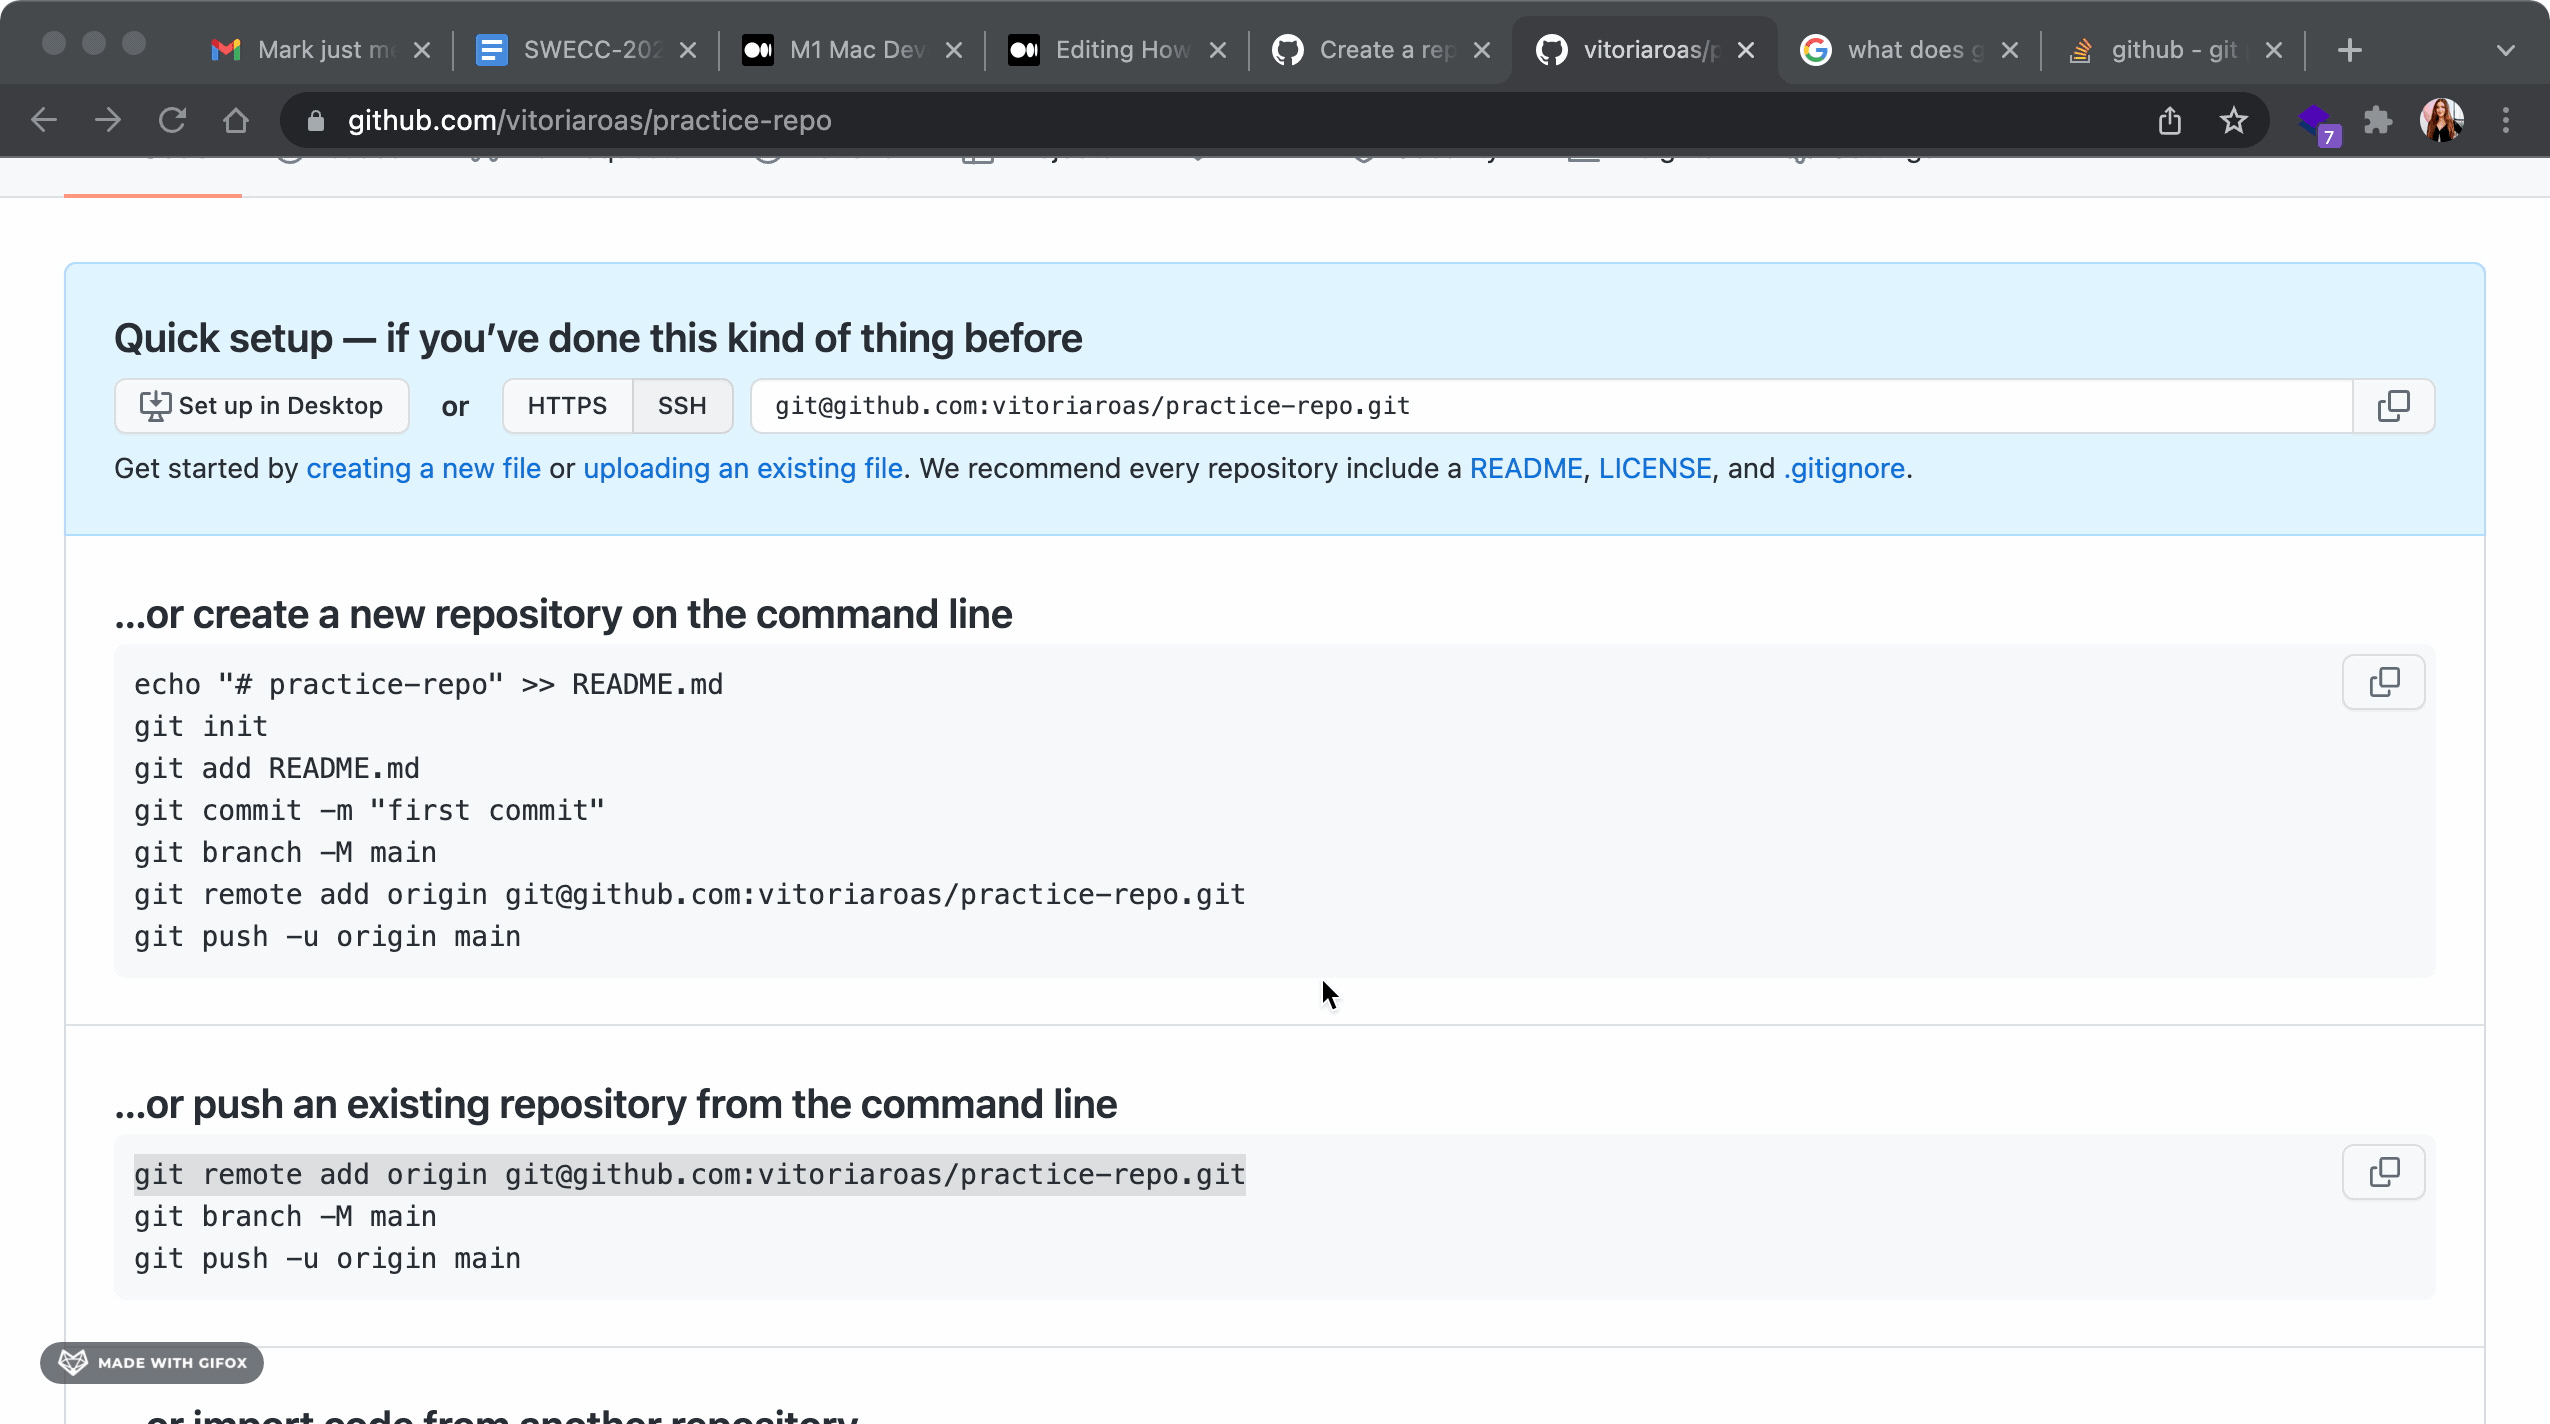
cd [path/to/your/project]
            git init
This command will create a new Git repository in your project folder.
git add .This command stages all the files in your project directory for the next commit.
git commit -m "Initial commit"This command creates a commit with the staged changes and includes a message describing the commit.
git remote add origin https://github.com/username/repository-name.gitReplace username with your GitHub username and repository-name with the name of
your repository.
git push -u origin masterThis command uploads your local commits to the remote repository on GitHub.
Visit your GitHub repository in a web browser to ensure that your project files have been uploaded successfully.
You have successfully uploaded your project to GitHub! Use these steps for future projects to keep your code organized and accessible.